Telescope Making and Astrophotography
Students enrolled in this January term course worked on their six-inch diameter telescope mirrors during the day and, if the weather conditions permitted, attempted astrophotography at night. For the astrophotography, they used the telescopes which were (and continue to be) available to all students who are taking or have completed the Astronomy course. They used the darkroom of Collier Hall of Science to process their photographic work. This darkroom is equipped for processing black-and-white negatives and prints, and both color negatives and transparencies, as well as producing color prints.
The steps involved in making a telescope mirror are the following:
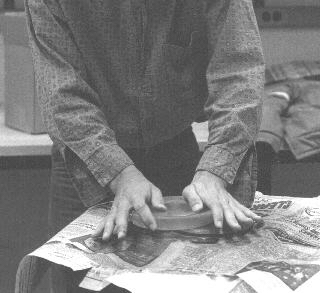
Coarse grinding uses a relatively coarse abrasive. Grinding is done by moving the glass mirror blank across a second piece of glass (called a "tool"), which is mounted onto the upper surface of a metal drum that is partially filled with water to make the drum, and consequently the tool, immobile. The grinding operation involves moving the mirror blank forward and backward across the tool while the person walks slowly around the drum.
Fine grinding involves progressively reducing the grain size of the abrasive and repeating the process above. The top of the drum and all components must be cleaned thoroughly each time the abrasive size is changed so no coarser abrasives remain to contaminate the finer abrasives. Random motions will cause the mirror to develop a concave spherical surface.
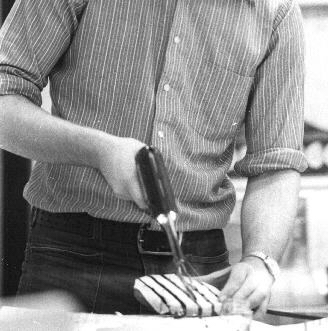
Polishing involves using a very fine abrasive on a pitch lap. The pitch will become impregnated with the abrasive. Here the pitch lap has been poured as a hot liquid which cools to a brittle, but deformable, solid. Grooves must be made in the pitch to allow the lap to progressively deform as the mirror takes the desired shape. The photograph shows the use of a soldering gun to melt grooves into the pitch lap surface.
A polish-water slurry is applied to the mirror with a paint brush. The mirror is then rubbed against the lap. The very fine polish particles lodge into the surface of the pitch to act as small blades which shave off glass from the mirror surface. As the surface of the mirror is progressively worked, it brightens as more glass is removed and fewer pits remain.
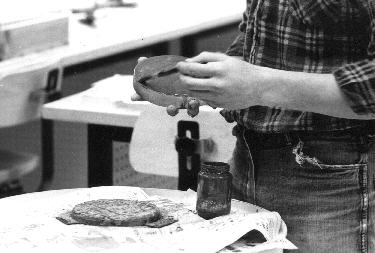
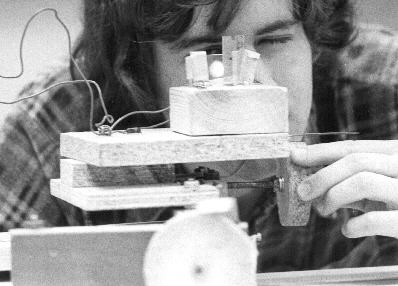
The mirror surface is tested with a Foucault tester of the slitless design. With this device, departures of the surface from a perfect sphere can be determined to an accuracy of about 1/20 of a wavelength of light. Once a perfect sphere is achieved, or nearly achieved, the polishing technique is modified to convert the sphere into the desired paraboloid. The tester also allows the shape of the paraboloid to be accurately measured.
The last step would be the application of the aluminum coating on the polished glass surface of the mirror. We sent out the mirrors to have this done commercially.
Astrophotography can be viewed on my photography web page.