Stellar Spectra - Telescope
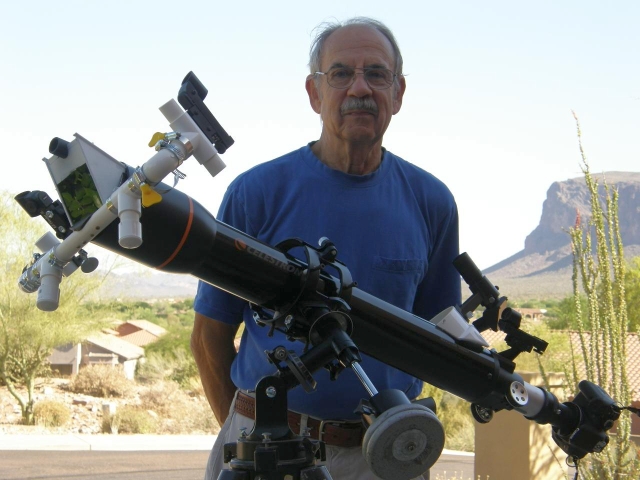
Me with my modified 4-inch refractor on my driveway in Gold Canyon, AZ. I placed a large glass prism in front of the 4-inch objective lens to create the stellar spectra, which form at prime focus on my CanonT4i digital camera. The telescope has no motor so all the images made through this telescope will show the apparent motion of the stars as a broadening of the spectral bands produced by the prism. The longer the exposure, the broader the band.
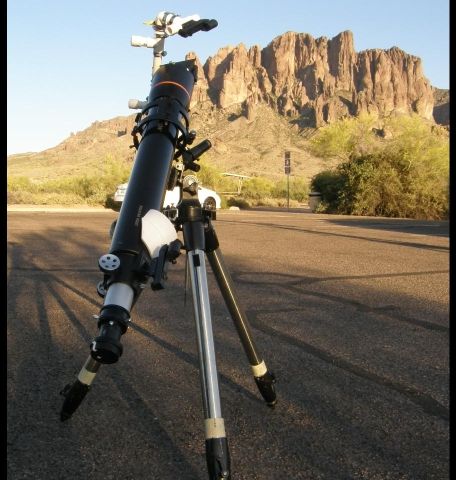
My stellar spectrograph is shown set up during the twilight hours before the start of a "star party" that will be hosted by the Superstition Mountain Astronomical League, of which I am a member. The site is Lost Dutchman State Park, located east of Phoenix, AZ, and the mountain in the background is Superstition Mountain.
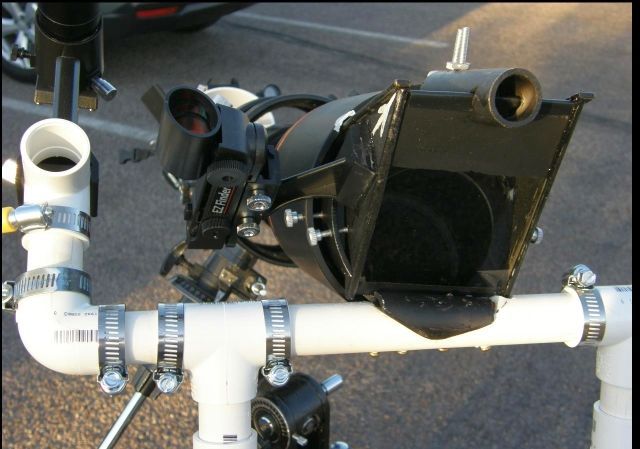
This shows a closer view of the large glass prism that I attached to the front end of the 4-inch refractor. I obtained this prism from eBay. It came from an old school overhead projector.
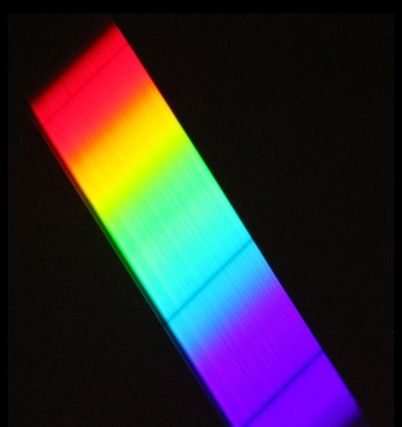
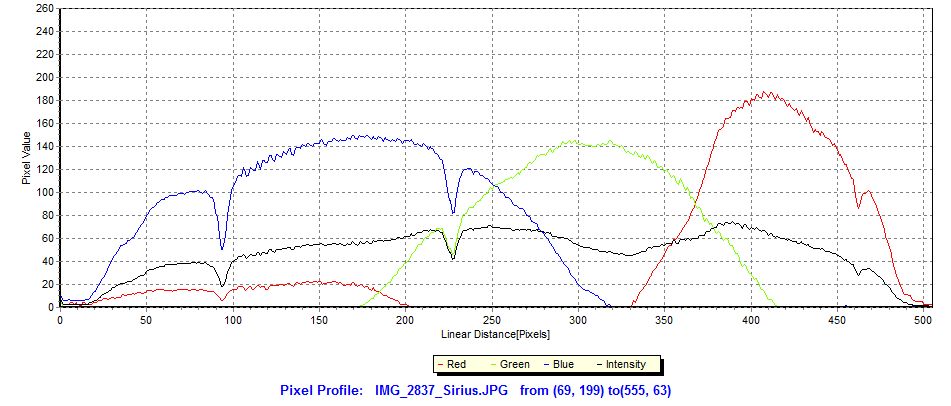
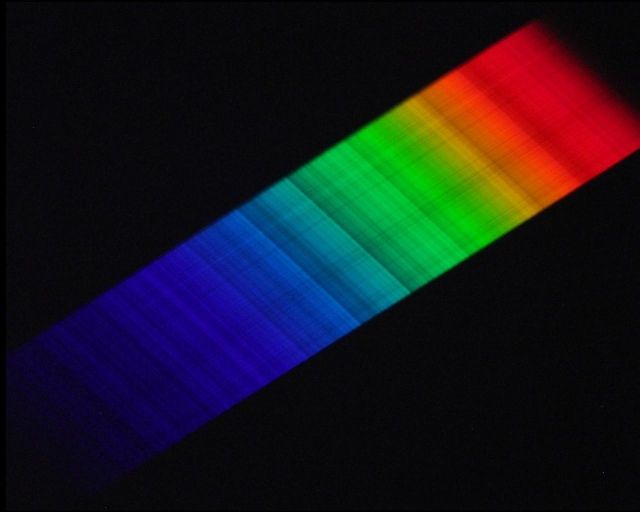
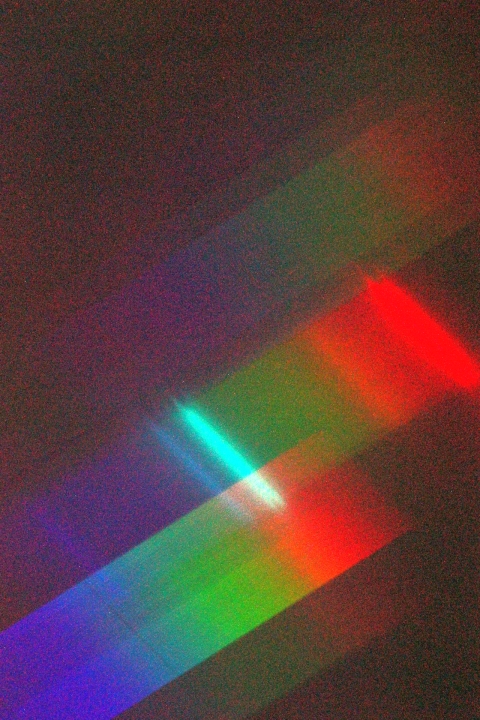
This 30-second exposure of the bright star Sirius clearly shows the alpha (red), beta (blue), and gamma (violet) absorption lines of the element hydrogen. Below is a graphical representation of the above spectrum in which the separate blue, green, and red channels are presented. Presented also, in black, but at a different scaling factor, is the combined totals for the three color channnels. Notice the hydrogen alpha, beta, and gamma lines are represented by dips in the curves.
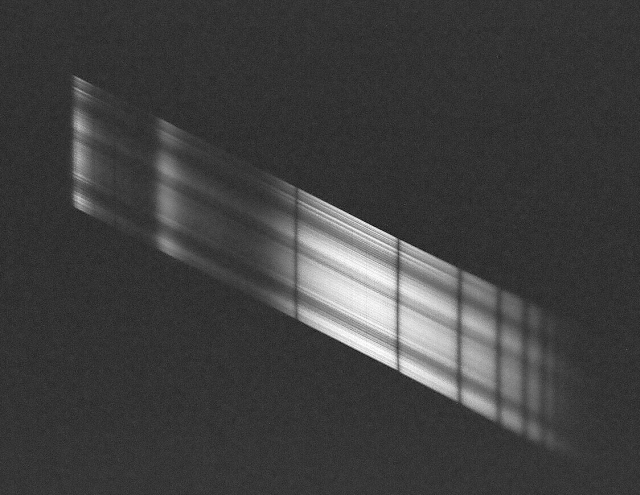
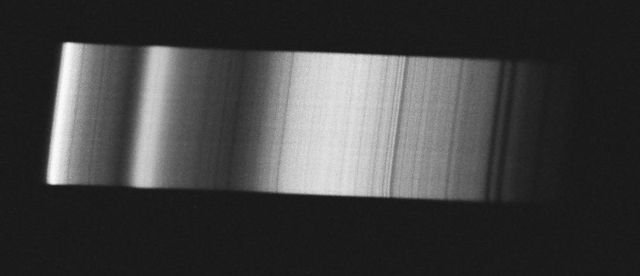
This is also the spectrum of Sirius, but I have used black-and-white infrared film in a Canon Rebel film body rather than the digital Canon T4i camera. The rendered spectrum extends farther in both the red (left) and blue (right) and shows many more absorption lines of the element hydrogen.
This is my 30-second exposure of the bright star Betelgeuse in the constellation Orion. Betelgeuse is a much cooler star than Sirius, so its spectrum exhibits very different absorption lines. It is so "cool" that some bands of molecules show prominently.
This 30-second exposure shows the spectrum of the binary pair of stars, Mizar (apparent magnitude 2.2) and Alcor (apparent magnitude 4), located in the handle of the Big Dipper. They are less bright than Sirius and Betelgeuse, so the sensitivity of the Canon T4i digital camera had to be increased, resulting in a grainier appearance of the spectra and a sky that is less dark. The prominent hydrogen alpha, beta, and gamma lines show up in both these stellar spectra. These two stars, Mizar and Alcor, are separated in the sky by 11.8 arc minutes (approximately 1/5 of a degree), giveing a sense of the scale of the image on the photograph (the full moon is about 1/2 degree).
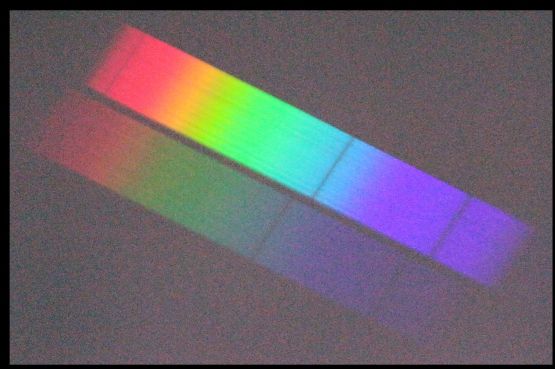
This 30-second exposure of M42, The Great Nebula in Orion, shows both an emission spectrum (bright bands) of the nebula and an absorption spectrum of some of the background stars.
The above image is the spectrum of the planet Jupiter as recorded by a 60-second exposure on black-and-white infrared film. Jupiter reflects the sun's light, so most of the absorption lines are solar, although other lines are from absorption by gases in Jupiter's atmosphere and, indeed, by absorption by gases in the Earth's atmosphere as well.
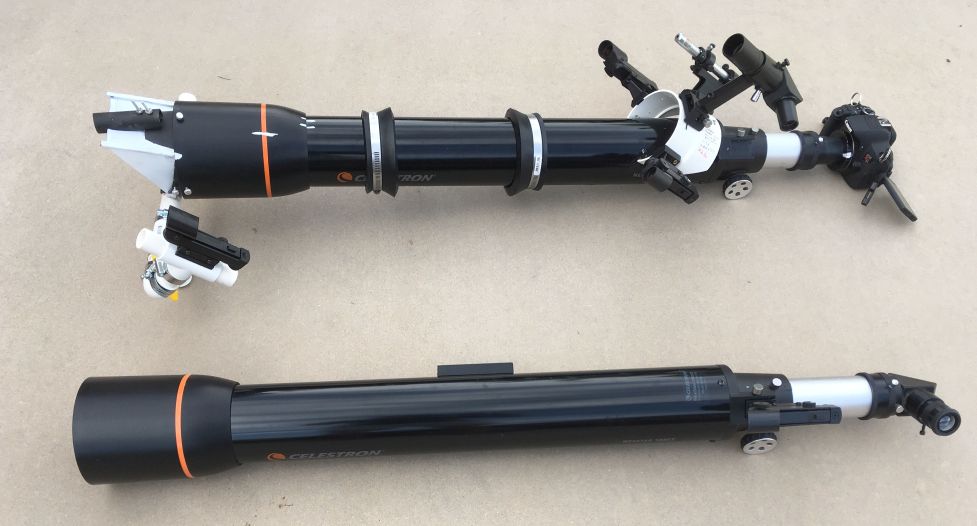
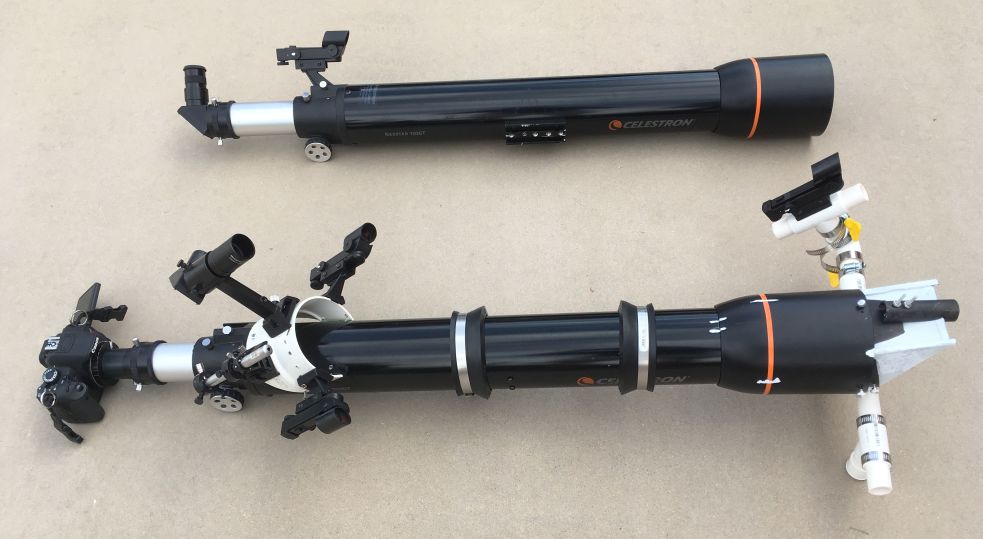
I purchased the 4-inch refractor that I modified to become my star spectrograph in about 2013 for about $100 when it was being offered by a supplier at a special low price. It is a Celestron Nexstar 102 GT acromat. Another member of the Superstition Mountain Astronomical League also purchased one at that time, and in 2018 I bought that person's telescope so I would have both the modified and unmodified versions. The following photographs show them side-by-side on my driveway.
The mounts are shown below.
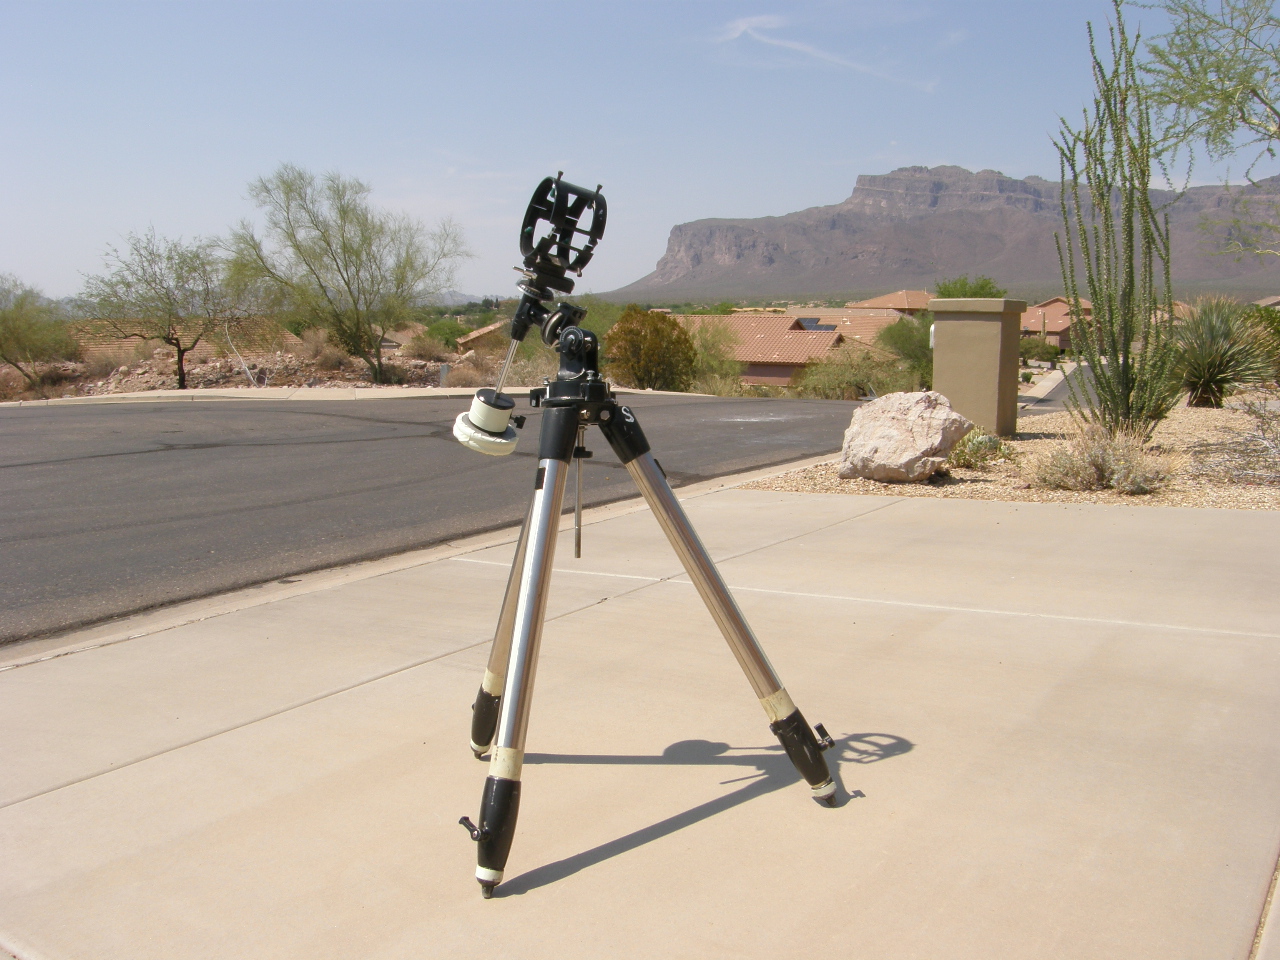
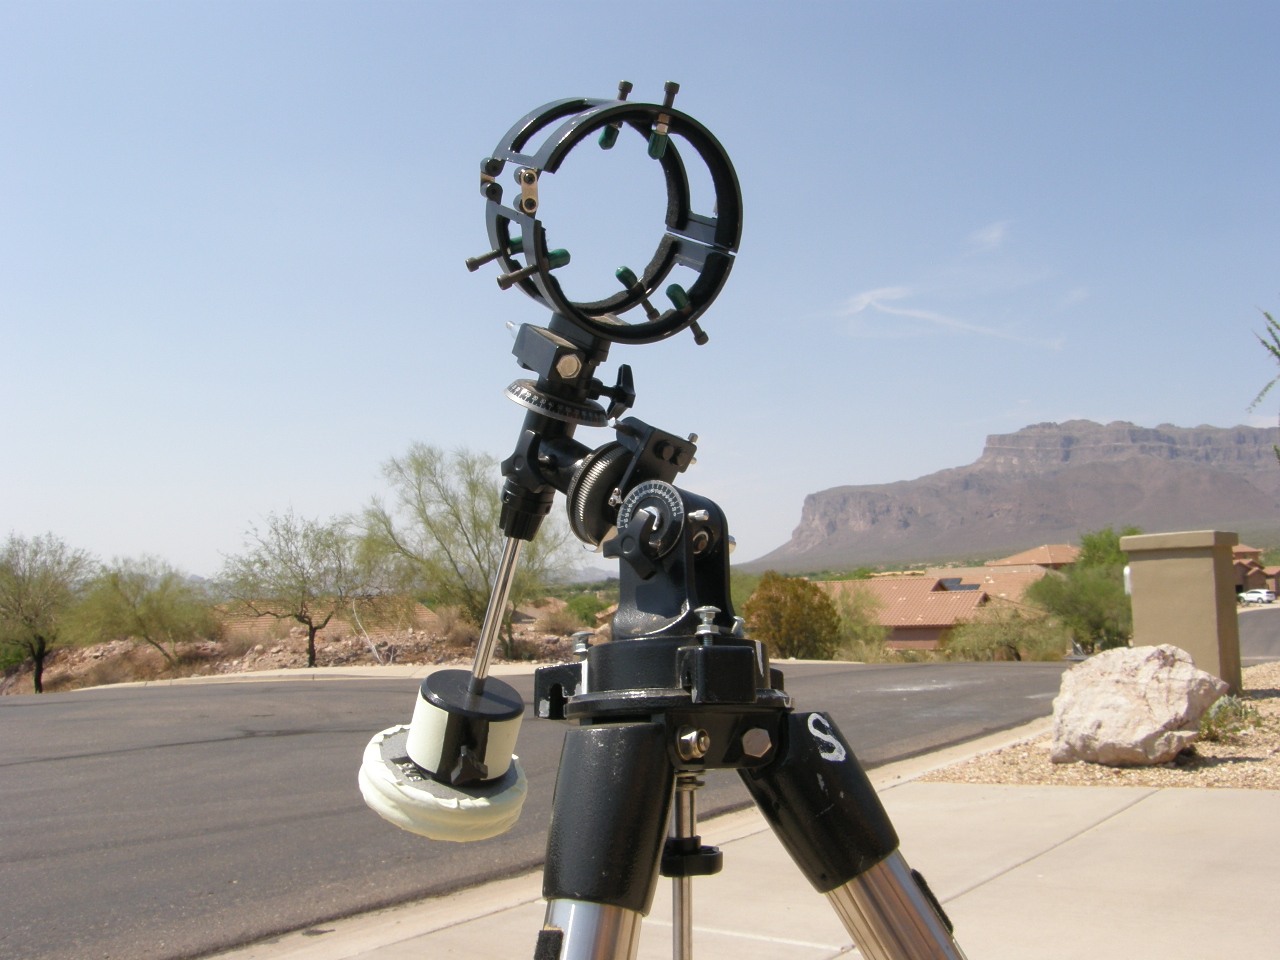
The above two images show the hand-me-down tripod and the mis-matched mount on top of it that I use for my 4-inch refractor-based stellar spectroscopy. Because there is no electric drive, all I need is a reasonably stable base for the time exposures. It is a homemade creation throughout.
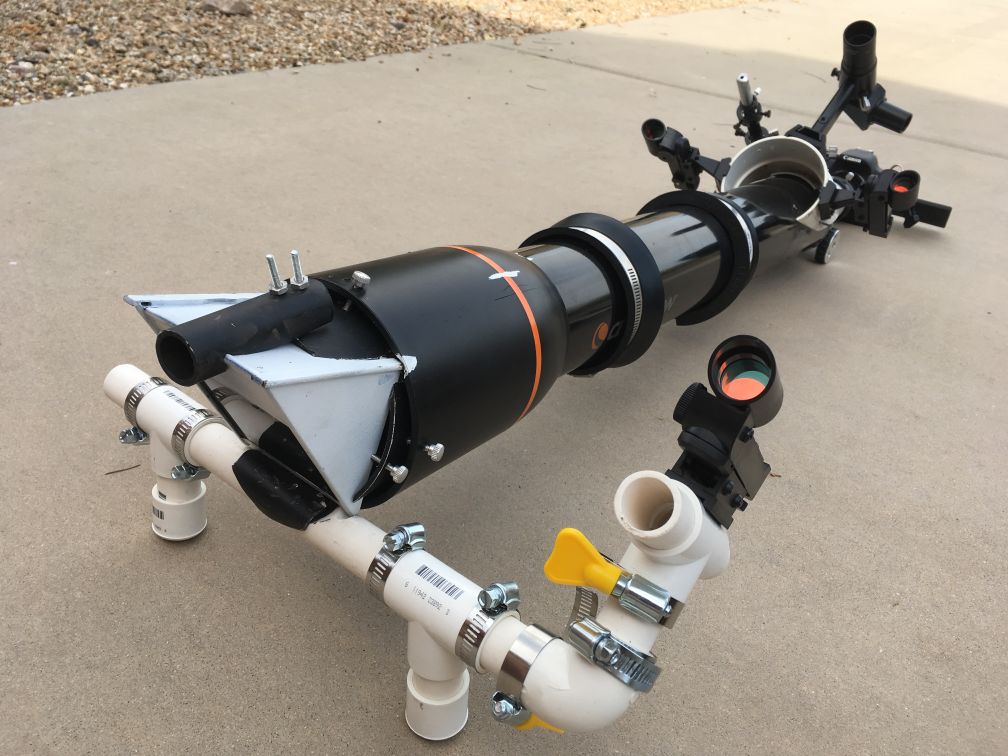
In the image below, notice the two plumbing-part "collars" near the middle of the telescope tube. They are helpful for setting up and taking down the telescope with and without the camera body. Both the large glass prism and the camera body are heavy objects, when compared to the telescope itself, so the "collars" limit the amount of unwanted slide of the telescope tube in the homemade mount.
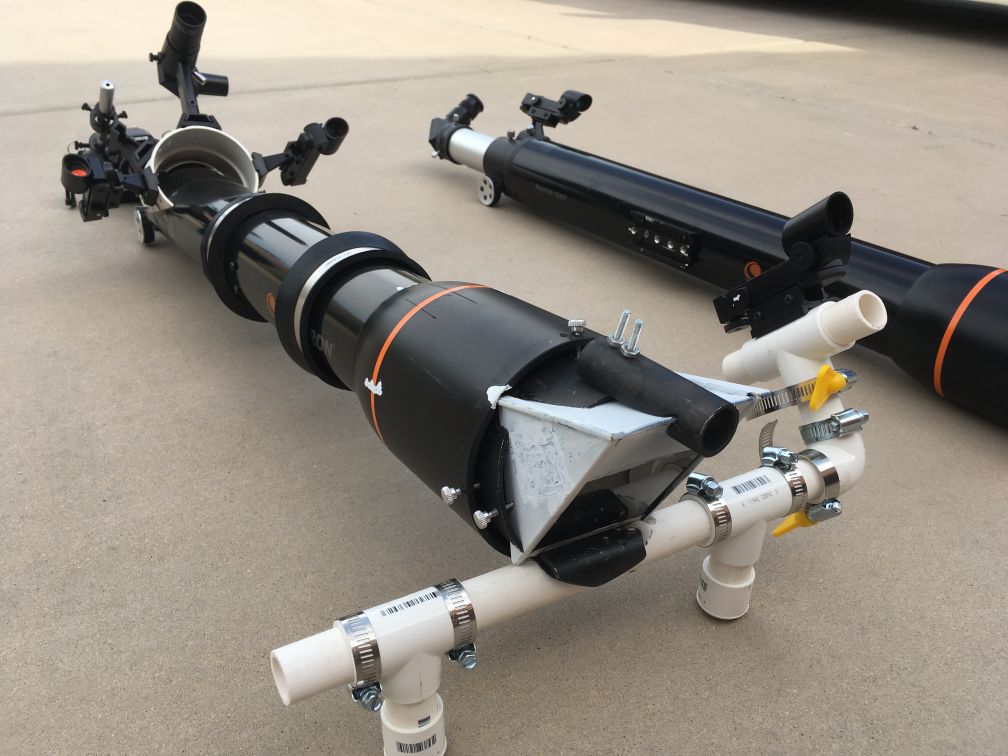
This is another view of the two 4-inch refractors. Notice the finders on the modified refractor. There are several because the light from the star is bent as it passes through the prism, so the telescope isn't viewing where it appears to be pointing. Because the telescope tube has to be rotated into a specific position to make the spectrum spread in the preferred direction, any particular finder may be located in an awkward position. The red dot finder on the front of the telescope is attached to my prism-holder mechanism and can be positioned to point anywhere in the sky, providing a great utility if the heavy prism shifts its position in transporting the telescope, but this forward finder is obviously inconvenient to use. Those in the back are convenient to use, although a tiny shift of the prism position may preclude the use of many, and maybe all, of these convenient finders.
On 6 April 2019, I used my star spectrograph at a "Star Party" at Lost Dutchman State Park which was hosted by the local astronomy group of which I am a member, the Superstition Mountain Astronomical League. Our group had a record turnout of about 500 participants that evening. When it got dark enough to start imaging with the spectrograph, I discovered that all the view finders at the camera end of the spectrograph were out of alignmnent due to a shift of the prism in transporting the scope to the state park site. Fortunately, I could rely on the less-convenient finder at the objective end of the spectrograph to find the stars for the many people who came through my station that night. At the next weekly meeting of the astronomy group, I presented information about the construction of the spectrograph, what happened at the star party, and how I solved that immediate problem. Bill Shaheen, who runs the meetings, recorded about 4 minutes of my presentation on his cell phone. In this brief video, I describe the prism, how I acquired it, how it is mounted in front of the objective lens of the telescope, and how it functions to produce a spectrum. Here is the link to the video:
https://youtu.be/yYhQfSwYqFo

This shows my Canon T4i camera on the eyepiece end of the telescope. I form the spectrum on the chip of the camera and display it on the touch screen of the camera, which is in its open position in this image. When successfully pointing the telescope at a star to take its spectrum, the star does not appear as a point on the camera viewfinder; rather, it appears as a very faint and very thin colored line, blue on one end and red on the other. I orient the line along the long axis of the viewfinder and place it slightly off-center so, when the time exposure is initiated, the line will drift across the center and parallel to the short axis of the viewfinder to create the broad colored band on which the atomic and/or molecular absorption lines and bands will appear. Thus, the spectrum is created over time. The eyepiece view would be an unimpressive thin colored line with tiny gaps, but the 30-second time-exposure camera view is a broad colorful band with black absorption lines conspicuously displayed on the camera screen.
For information about the Superstition Mountain Astronomical League, see the following:
supermtnastro.com
and for the image repository, see the following:
www.pbase.com/supermtnastro/superstition_mountain_astronomical_league
For information about the East Valley Astronomy Club, see the following: http://evaconline.org/